GE is doing this great project - during the month of april, they will plant one bulb for each unique visitor to their website - click
HERE to help!
I didn't manage to get any pictures today (got pulled in too many other directions) so I'll have to post them later, but here are some of the things we do in the garden to help save money and decrease our plastic use.
My mom likes to start plants from seeds, and she uses the Jiffy pellets to start them out. Once they are big enough, she replants them into yogurt containers until they get big enough to go outside. (One additional tip - if you keep a fan running on them, the seedlings will be a lot stronger than if you don't.) My mom also saves other plastic or foam containers (from sour cream, cottage cheese, meat, mushrooms, etc) to use for seed beds. Works great, we don't have to pay anything extra for them, and they are reusable year after year.
We also save wide mouth glass and plastic jars from various sources to use as storage for the herbs we grow. Nothing better than making sauce with homegrown basil and oregano (My favorites are Spicy Globe Basil and greek oregano)
Paper can be shredded and used in the garden for mulch, as long as it isn't the shiny colored papers. We also lay out broken down cardboard boxes to help prevent weeds. Makes it a lot easier to keep the garden weed free.
On the scrappy end of things, I like to keep the flat part of plastic packaging to use on my pages - I can punch it or stamp it or layer it... the possibilities are endless. I also keep ribbons from things (I swiped the ribbons of a couple of the candy things the kids got for easter). Bread bag tags make a cute addition to pages too - I like to put rubons on mine to add a mini tag.
One other thing I like that we do... there is never any wasted food at my house. Even if the kids don't finish their dinners, it doesn't go to waste. We have chickens, who are MORE than happy to clean up any leftovers we may have. And we have the yummiest eggs around. There is no comparison between a home grown egg and a storebought egg. (Plus the amusement factor is amazing.. and the kids love having easter egg hunts every day! We have a variety of brown egg layers, plus Aracaunas and Marins, so our eggs come in brown, pink, green, blue, and chocolate.)


 This is really a mini mini-album, which made it a project that was done in just a few hours, including drying time.
 Most of the painted pieces for this album were chipboard. Some pieces were covered with cardstock, which is another thing I like to do ahead of time. I use Zip Dry to attach the patterned paper to the chipboard. Once dry, I use a technique I learned at a Basic Grey make and take - use a file to sand the paper at the edges of the chipboard - it eliminates the need to cut with a craft knife or scissors, and gives the sanding effect I love at the same time - which means I don't have to do the edges twice.
 One of my favorite techniques to use on the acrylic is to emboss it with a cuttlebug folder, paint it, then wipe off the excess paint. I love how the paint stays in the embossed areas of the acrylic. This technique cannot be done on all acrylics though - the acrylic has to be soft enough to be embossed (acrylic from a home improvement store generally will not work for this).

 Once the pages were all prepped, painted, sanded, and dry, I clipped them together and used the Bind It All to punch the binding holes. It was thick enough I had to do it in two sets. A lot of the mini albums I do come pre-punched for rings, but one of the nice things about the Clear N Chips is that you can make them any way you want to.
 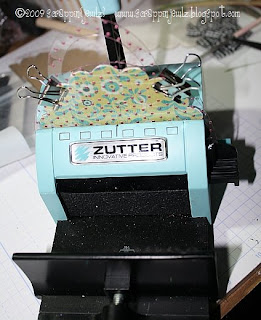 Once the albums was bound together, I added the embellishments. The key things to remember when making acrylic albums arethe Peek A Boo Effect, and hide the adhesive. The Peek A Boo Effect means that you can see bits of the next page through it. I don't believe in covering every inch of an acrylic page - if you are going to do that, get a chipboard album. Covering up the acrylic defeats the purpose (and that's one of the reasons I like to mix chipboard and acrylic pages).
 The next few pages were fun to do, and one of the things I like to do a lot of with my acrylics. It looks like the black frame is on the right hand photo.. but it isn't. There is an acrylic page between the two photos - and the rub on frame is on the acrylic page. That way, when the page is turned, it frames the photo on the other side. Sometimes this takes a bit of planning, and sometimes it is pretty easy (like with these two photos).
 On the last page I used Thickers again, and left the back cover blank other than the paint. I always add the ribbon last, as I think thebindings look too plain without them. (And, for the ringed albums, I usually make all the pages before I bind them, so it's become a habit.)
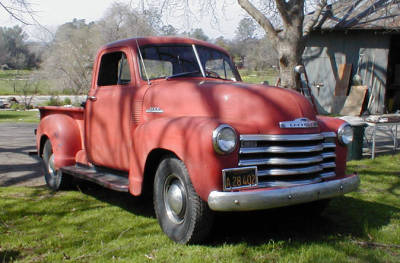 Bears a striking resemblence to Jones, dunnit?


