


Made with the Clear Scraps Amy's Fashion Clear N Chip mixed pack mini album set.
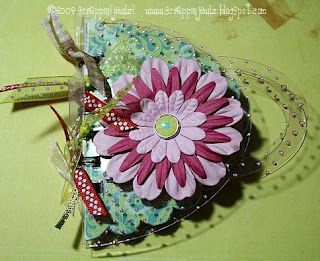 This is really a mini mini-album, which made it a project that was done in just a few hours, including drying time.
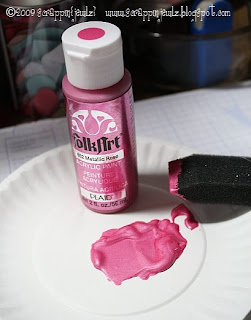
 Since paint takes a bit to dry, I tend to do all of my painting first. I like to use the Folk Art acrylic paints, especially the metallic ones - they have a shimmer to them that I just love. (this set includes pieces that I used for layouts too)
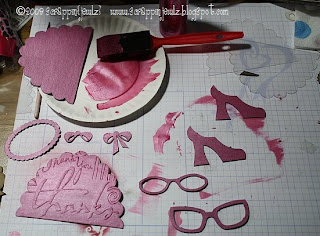 Most of the painted pieces for this album were chipboard. Some pieces were covered with cardstock, which is another thing I like to do ahead of time. I use Zip Dry to attach the patterned paper to the chipboard. Once dry, I use a technique I learned at a Basic Grey make and take - use a file to sand the paper at the edges of the chipboard - it eliminates the need to cut with a craft knife or scissors, and gives the sanding effect I love at the same time - which means I don't have to do the edges twice.
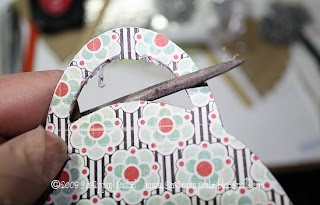 One of my favorite techniques to use on the acrylic is to emboss it with a cuttlebug folder, paint it, then wipe off the excess paint. I love how the paint stays in the embossed areas of the acrylic. This technique cannot be done on all acrylics though - the acrylic has to be soft enough to be embossed (acrylic from a home improvement store generally will not work for this).

 Once the pages were all prepped, painted, sanded, and dry, I clipped them together and used the Bind It All to punch the binding holes. It was thick enough I had to do it in two sets. A lot of the mini albums I do come pre-punched for rings, but one of the nice things about the Clear N Chips is that you can make them any way you want to.
  Once the albums was bound together, I added the embellishments. The key things to remember when making acrylic albums arethe Peek A Boo Effect, and hide the adhesive. The Peek A Boo Effect means that you can see bits of the next page through it. I don't believe in covering every inch of an acrylic page - if you are going to do that, get a chipboard album. Covering up the acrylic defeats the purpose (and that's one of the reasons I like to mix chipboard and acrylic pages).
For the cover of this album, I punched a hole in the center with my crop-a-dile to put the brad through. The chipboard shoes cover the prongs on the back side. The DIVA letter stickers are Thickers from American Crafts. Sometimes I add extra adhesive (Zip Dry) to help them stay in place since the albums get handled a lot.
 The next few pages were fun to do, and one of the things I like to do a lot of with my acrylics. It looks like the black frame is on the right hand photo.. but it isn't. There is an acrylic page between the two photos - and the rub on frame is on the acrylic page. That way, when the page is turned, it frames the photo on the other side. Sometimes this takes a bit of planning, and sometimes it is pretty easy (like with these two photos).
 On the last page I used Thickers again, and left the back cover blank other than the paint. I always add the ribbon last, as I think thebindings look too plain without them. (And, for the ringed albums, I usually make all the pages before I bind them, so it's become a habit.)


No comments:
Post a Comment